
Proper Steps for Safely and Efficiently Inserting a Winged Infusion Set During Phlebotomy: A Guide for Healthcare Professionals
Summary
- Proper training and certification are essential for healthcare professionals to safely and efficiently insert a winged infusion set during phlebotomy procedures.
- Certain steps, such as selecting the appropriate vein, cleaning the site, and securing the set in place, can help minimize risks and ensure successful blood draws.
- Following the established guidelines and protocols can help maintain a sterile environment and prevent potential complications for both the patient and the healthcare provider.
Introduction
Phlebotomy procedures play a vital role in the healthcare industry, as they involve the collection of blood samples for diagnostic testing and monitoring of patients' health. To safely and efficiently perform phlebotomy, healthcare professionals must follow specific guidelines and protocols to minimize risks and ensure accurate results. One essential aspect of phlebotomy is the proper insertion of a winged infusion set, also known as a butterfly needle or scalp vein set. In this article, we will discuss the proper steps for safely and efficiently inserting a winged infusion set during phlebotomy procedures in a medical lab setting in the United States.
Steps for Safely and Efficiently Inserting a Winged Infusion Set
1. Obtain Proper Training and Certification
- Before performing phlebotomy procedures, healthcare professionals must undergo formal training and obtain certification to ensure they have the necessary knowledge and skills to safely collect blood samples.
- Training programs typically include classroom instruction, hands-on practice, and supervised clinical experience to help healthcare professionals learn about anatomy, physiology, infection control, and phlebotomy techniques.
- Once healthcare professionals complete their training, they must pass a certification exam to demonstrate their competency and proficiency in phlebotomy procedures.
2. Prepare the Equipment and Supplies
- Gather all the necessary equipment and supplies, including a winged infusion set, alcohol swabs, gauze pads, tourniquet, gloves, and a biohazard container for safe disposal of used materials.
- Inspect the winged infusion set to ensure it is sterile and free of any defects or damage that could compromise patient safety or the accuracy of blood collection.
- Check the expiration date on all supplies and discard any expired or damaged items to maintain a sterile environment and prevent potential contamination.
3. Select an Appropriate Vein
- Prioritize the selection of veins in the order of preference, starting with the median cubital vein, followed by the cephalic vein, and then the basilic vein, to increase the chances of a successful blood draw.
- Use the patient's medical history, physical examination, and knowledge of vein anatomy to identify suitable veins for blood collection based on their size, visibility, and accessibility.
- Avoid veins that are fragile, small, or close to valves, joints, or arteries, as they may be more prone to collapsing, causing pain, or leading to potential complications during blood collection.
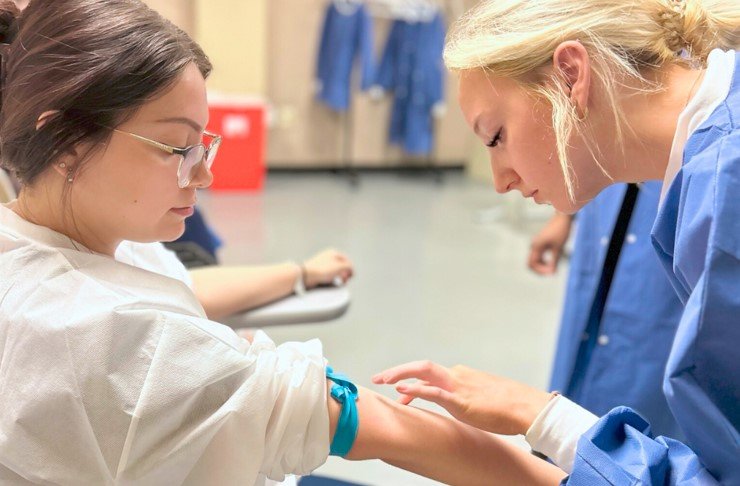
4. Clean and Prepare the Site
- Explain the procedure to the patient and obtain Informed Consent before starting the blood draw to ensure they understand the process, potential risks, and benefits of the phlebotomy procedure.
- Apply a Tourniquet a few inches above the intended site to help dilate the vein and make it easier to locate and access for blood collection.
- Clean the site with an alcohol swab using a circular motion starting from the center and moving outward to remove any dirt, debris, or bacteria that could contaminate the blood sample or cause an infection.
5. Insert the Winged Infusion Set
- Hold the patient's arm steady and anchor the chosen vein by gently pulling the skin taut to stabilize the vein and prevent it from moving during the insertion of the winged infusion set.
- Angle the needle at approximately 15-30 degrees and insert it into the vein using a quick, smooth motion to minimize discomfort, trauma, or damage to the surrounding tissues.
- Release the Tourniquet once blood starts to flow into the collection tube to prevent the vein from collapsing due to increased pressure and ensure a sufficient volume of blood is collected for testing.
6. Secure the Set and Disinfect the Site
- After collecting the blood sample, remove the needle from the vein and immediately apply pressure to the site with a gauze pad to promote hemostasis and prevent Excessive Bleeding or bruising.
- Secure the winged infusion set in place with adhesive tape to prevent accidental dislodgement and ensure the safety of the healthcare professional and the patient during the blood collection process.
- Dispose of used materials, such as gloves, gauze pads, and the winged infusion set, in a biohazard container to maintain a clean and safe environment and prevent the spread of Infectious Diseases.
Conclusion
Properly inserting a winged infusion set during phlebotomy procedures is essential for obtaining accurate blood samples and ensuring the safety and well-being of both patients and healthcare professionals. By following the steps outlined in this article, healthcare professionals can minimize risks, prevent complications, and achieve successful blood draws in a medical lab setting in the United States.
Disclaimer: The content provided on this blog is for informational purposes only, reflecting the personal opinions and insights of the author(s) on the topics. The information provided should not be used for diagnosing or treating a health problem or disease, and those seeking personal medical advice should consult with a licensed physician. Always seek the advice of your doctor or other qualified health provider regarding a medical condition. Never disregard professional medical advice or delay in seeking it because of something you have read on this website. If you think you may have a medical emergency, call 911 or go to the nearest emergency room immediately. No physician-patient relationship is created by this web site or its use. No contributors to this web site make any representations, express or implied, with respect to the information provided herein or to its use. While we strive to share accurate and up-to-date information, we cannot guarantee the completeness, reliability, or accuracy of the content. The blog may also include links to external websites and resources for the convenience of our readers. Please note that linking to other sites does not imply endorsement of their content, practices, or services by us. Readers should use their discretion and judgment while exploring any external links and resources mentioned on this blog.